How Do I Implement a Web Services Trigger? (Magic xpi 4.5)
This How To topic will guide you through building a Magic xpi project that will be a Web service provider. The service will receive two numeric arguments from a Web services consumer (client). Magic xpi will receive the request, calculate the sum of the two numbers, and return it to the consumer.
-
Open the Settings dialog box's Resources section and define a new Web Services Server resource, with Systinet connection details. The default connection values are:
-
Open the Settings dialog box's Services section and define a new Web Services service, named SumService.
-
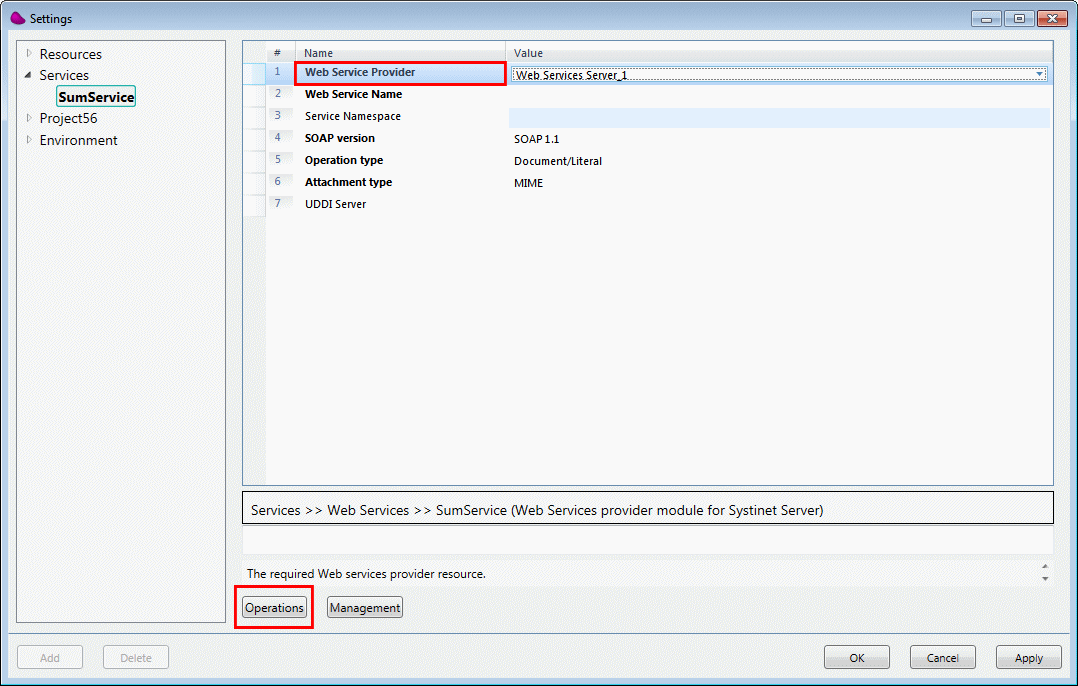
In the Service Setting dialog box, select the previously created Web Service Server resource as the Web Service Provider. Enter a Web Service Name and use the default values for the remainder of the parameters, and click the Operations button, as shown below.
-
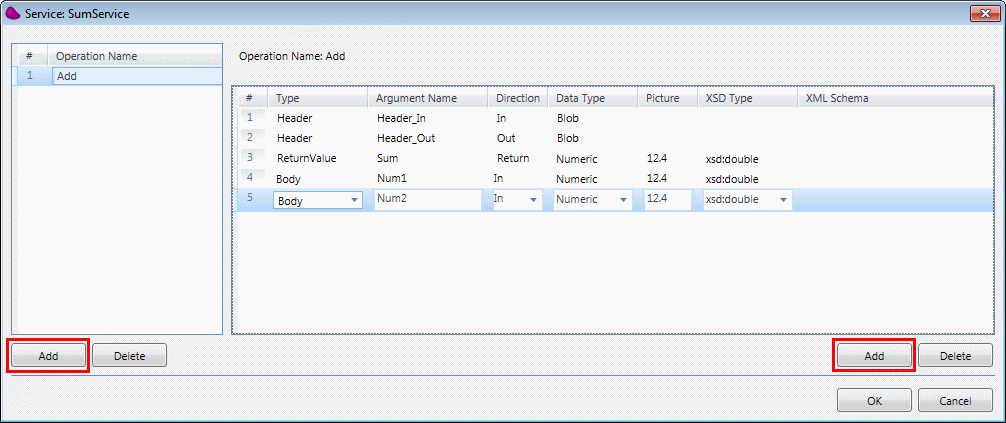
In the Operations dialog box, you should now define the Add operation and its arguments. Click the Add button to create a new operation, and name it Add.
-
In the Arguments section of the Operations dialog box, change the return value name to Sum, and change the type to Numeric.
-
Add two more arguments and name them Num1 and Num2. Set their Direction to In, and their Data Type to Numeric, as shown below.
Click OK to return to the Settings dialog box.
-
In the Settings dialog box, click the Management button to open the deployment Management dialog box.
-
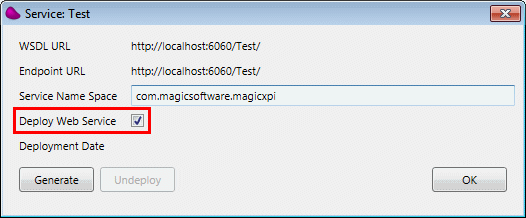
In the deployment Management dialog box, you can generate the Magic xpi service and the Systinet .jar file. When you check the Deploy Web Service box, the service is deployed to the Systinet server, enabling it to function.
-
Click the Generate button to deploy the new service.
You should see a confirmation message if the service was successfully deployed, or an error message with details if something went wrong.
If you get an error message, or a Not Authorized 404 message, you should check that the connection details in the Web Service Server resource are correct. You should also try to log in to the Systinet console with the same user name and password.
If the generation and deployment of the service was successful, you can use the new service in a flow. To do this, follow these steps:
-
In the Solution Explorer, select the business process in which you want to insert the flow.
-
From the Project menu, click Add and then Flow. Name your new flow AddFlow.
-
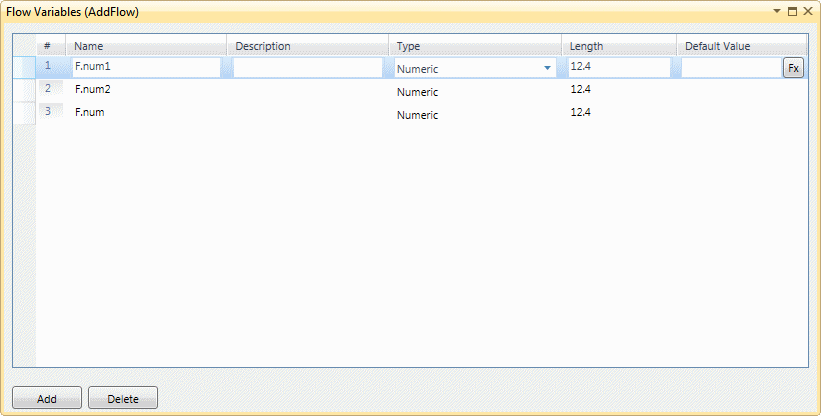
Under the new flow in the Solution Explorer, double-click Flow Variables to open the Flow Variables repository. Create the following flow variables:
|
|
|
|
|
F.num1
|
Numeric
|
The first number.
|
|
F.num2
|
Numeric
|
The second number.
|
|
F.num
|
Numeric
|
The sum of the two numbers.
|
-
Drag a Web Services utility to the flow trigger area.
-
In the Web Services utility's Properties pane, select SumService from the Service Name drop-down list.
-
Double-click or right-click on the Web Services utility and select Configuration from the context menu to open the Web Services Trigger Configuration dialog box.
-
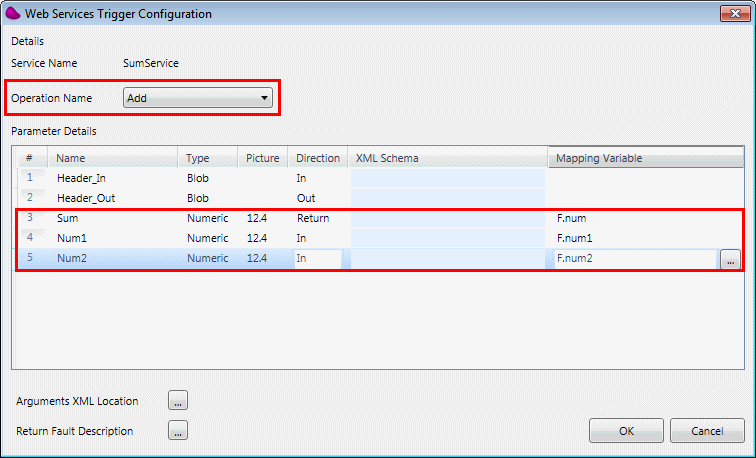
In the Web Services Trigger Configuration dialog box, select Add from the Operation Name drop-down list.
-
In the Return expression, use the F.num variable.
-
For parameters Num1 and Num2, use the F.num1 and F.num2 variables respectively, as seen below.
-
Click OK to exit the configuration of the component.
-
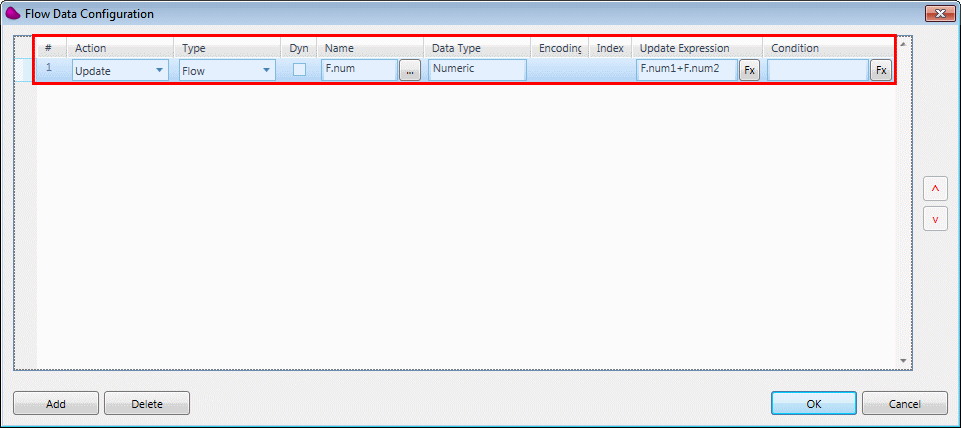
Next, drag a Flow Data utility to the flow area, and update the F.num expression with the sum of F.num1+F.num2, as seen below.
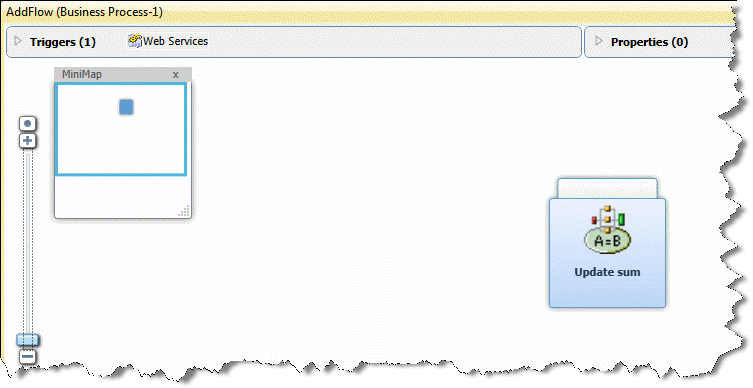
The resulting flow should look like this:
-
From the Build menu, select Build Solution to generate the flow for deployment.
To test your new Web service, follow these steps:
-
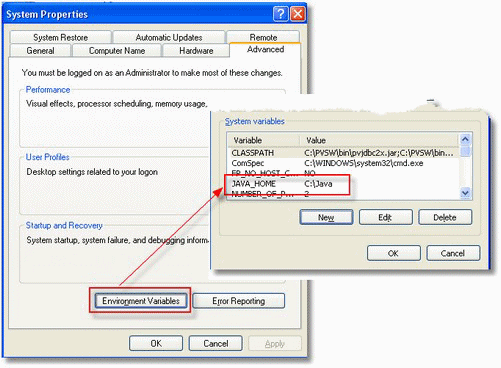
Make sure that the Java runtime engine is installed by checking the %Java_Home% system variable.
-
Go to Start->My computer, and from the right-click menu, select Properties.
-
From the Advanced tab, select Environment variables. You should see JAVA_HOME listed.
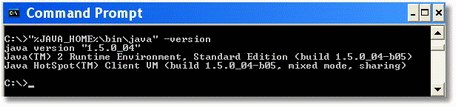
You can also issue the “%JAVA_HOME%\bin\java” -version command at the command prompt.
If either of these does not work, you may have an installation issue. Re-installing Magic xpi may solve the problem.
-
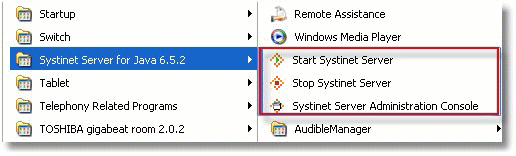
Start the project in the Server, either from the project start link or from the Magic xpi Monitor, and verify that it started successfully.
-
Open an Internet browser (Internet Explorer or Mozilla Firefox) and call the Systinet console URL (http://localhost:6060/admin/console). You should see the following screen.
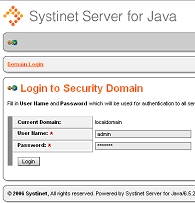
Log in using your Systinet user name and password.
-
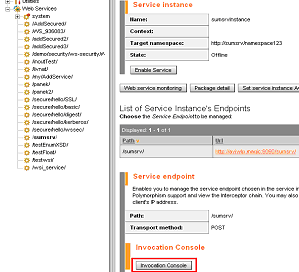
Navigate to your service in the Web Services Tree, and click the Invocation Console button, as shown below.
-
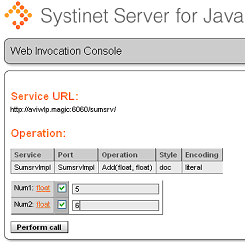
Select the operation that you want to test, fill in the test data, and click the Perform call button, as shown below.
-
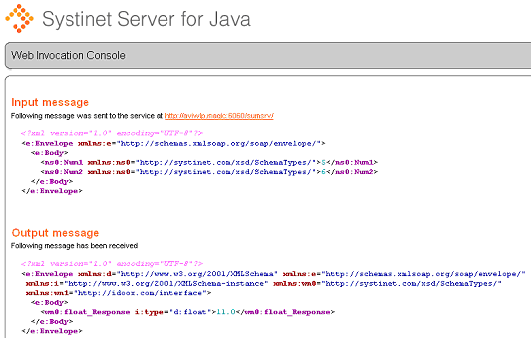
A successful call should look like the image below.
|
Note:
|
You can also test the service from any external tool (such as XML Spy), from a Web service studio, or from code.
|
