How Do I Provide Web Services with Magic xpa? (Magic xpa 3.x)
Web services are the standard way to interoperate between applications on different platforms, frameworks, etc. Web services are a good way to provide access to your application from the outside world. Using a Web service, various types of applications, written in many different languages, anywhere in the world, can interface with your application in real time. As useful as they are, however, creating a Web service manually can be very tedious and time-consuming. Fortunately, Magic xpa automates the creation of the service to make it quite easy.
You can provide Web services from any Magic xpa project. In fact, you create a Magic xpa Web service program as you would any other batch program, using the Parameters and the Return property to pass values in and out. Magic xpa will create the interface so that these can be used in a properly-formed Web service. The steps in providing a Web service are listed below.
Before you can create a Web service, you need to have the appropriate setup for Magic xpa. When you installed Magic xpa, it should have installed the Web services framework.
As part of this installation, Magic xpa will install the Java SDK, which Magic xpa uses to compile the Java components needed by the SOAP service.
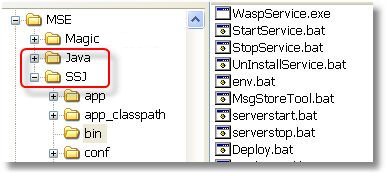
Magic xpa also installs the Systinet Server for Java, which is what you will use to actually deploy the SOAP service.
If these products are already installed on your machine, then Magic xpa will use the versions already installed. Otherwise, it will create them as subdirectories in the MSE folder. In any case, to deploy Web services, you need to have these two products installed and operational.
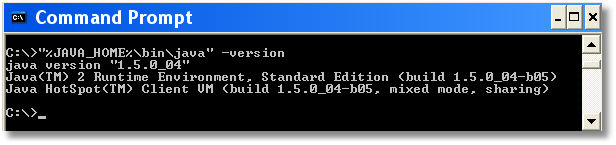
You can check the Java installation by issuing the command
“%JAVA_HOME%\bin\java” -version
If the JAVA_HOME environment variable is set correctly, and the Java SDK is installed, you will get a message indicating the Java version.
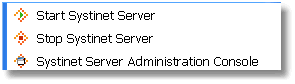
When Systinet is installed, you will have some entries on your Start menu that will allow you to start and stop the server, and to use the Systinet console.
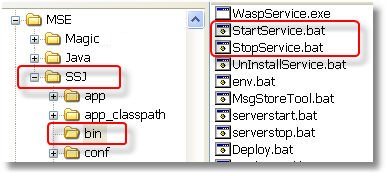
You can also see the StartService and StopService .bat files in the SSJ directory, or by running the command line code:
“%WASP_HOME%\bin\serverstart.bat”
When the service is started, you can also start the console by entering the following in your browser:
http://localhost:6060/admin/console
We’ll talk more about these later, but for now, just verify that they bring up a program.
Once you’ve validated that everything is installed correctly, you are ready to deploy your Web service.
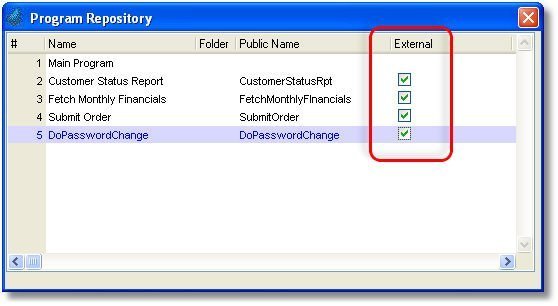
First, you need to make sure that the programs you want to expose each have a unique Public name, and have the External box checked. These programs will be batch programs. They can accept and return values using Parameters in the Data View, and they can also return one value using the Task Properties->General->Return value property. These values can be simple data fields, or they can be BLOBs containing complex XML data.
Before starting the Systinet server, you need to do the following (once) to the %WASP_HOME%\bin\server.bat file (Since version: 3.1):
-
There are classpath and properties settings for both middlewares – GigaSpaces and the Magic xpa broker. You should comment/uncomment these settings according to the required middleware.
-
There are two statements starting with set WASP_CLASSPATH. The first should be uncommented for the Magic xpa Broker middleware. The second should be uncommented for the GigaSpaces middleware.
-
There are two statements starting with "%JAVA_CMD%" %WASP_XPARAMS%. The first should be uncommented for the GigaSpaces middleware. The second should be uncommented for the Magic xpa Broker middleware.
Now you need to start Systinet. You can do this from the Start menu, using the Start Systinet option. Or, you can run:
%WASP_HOME%\bin\serverstart.bat
From within your Magic xpa application, select Options->Interface Builder->Web Service. You will see a screen, “Welcome to the Web Service Interface Builder”. Click Next.
Next, start the console. You do this in your browser, by entering the URL:
http://localhost:6060/admin/console
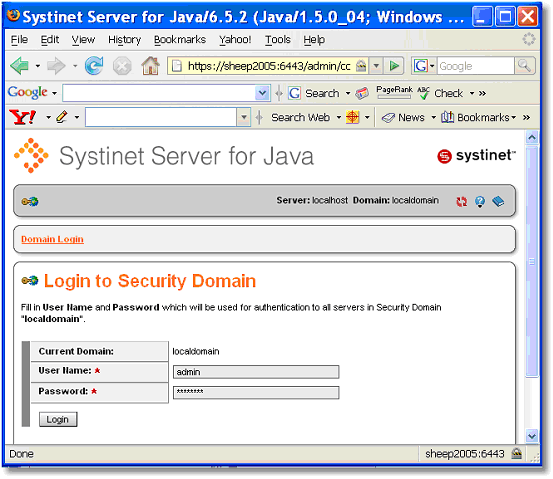
The default user is admin, and the default password is changeit.
From within the Magic xpa Studio, select Options->Interface Builder->Web Service. You will then see the Web Service Interface Builder start screen.
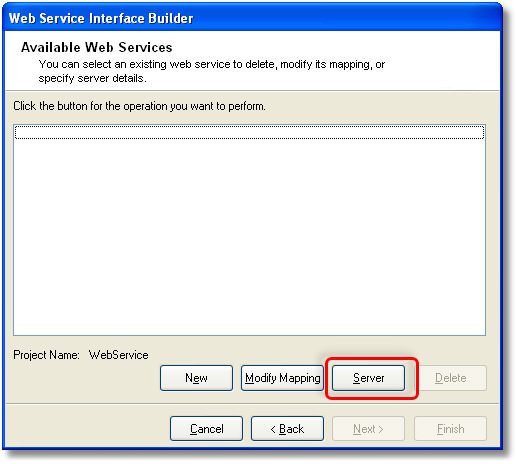
Now you’ll see a list of available Web services. If you haven’t created any yet, this list will be empty. Click the Server button.
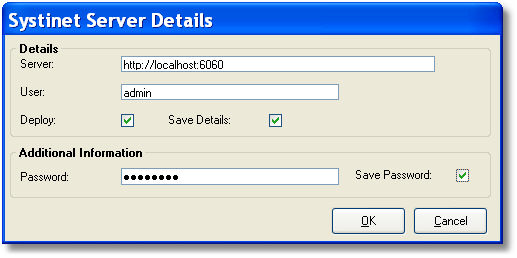
For the server details, you need to enter the location and login details. The default Systinet settings are server localhost:6060, user admin, and a password of changeit.
Note: After installing Magic xpa you are required to enter the password. To avoid entering it each time you define a service, check the Save Password box.
If you check Deploy, the service will be automatically deployed after it is produced.
Now, from the Available Web Services list, select New. You will be presented with the Web Service Details screen.
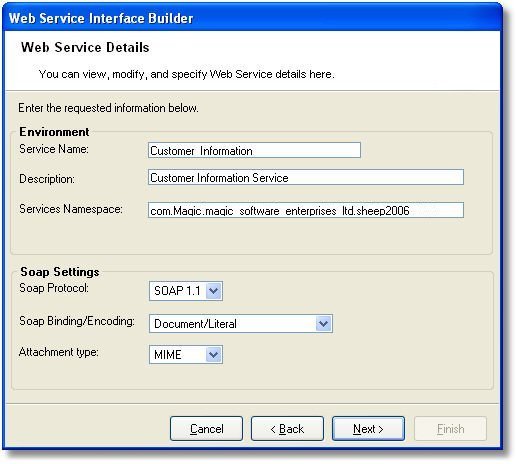
Here you provide the Service name, Description, and Namespace. These should be text that is meaningful to the user.
For Soap Protocol, SOAP 1.1. is the most compatible with most clients.
Soap Binding/Encoding can be Document/Literal, Wrapped/Literal, RPC/Literal, or RPC/Encoded.
Attachment type can be MIME or DIME. MIME is the most compatible with most clients.
When you are finished, click Next.
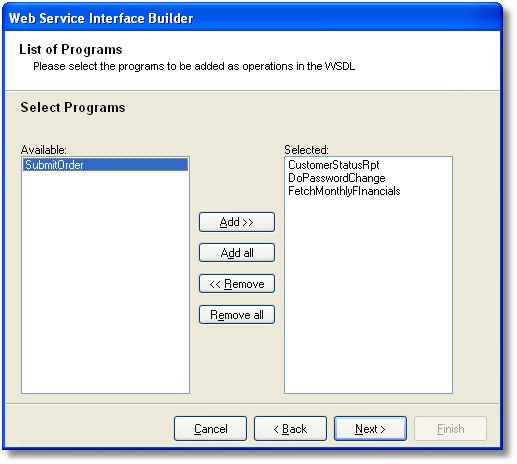
You will be presented with a list of all the batch programs that are defined with Public names and with the External box checked. You can use the buttons in the middle to move the programs you want to expose in services to the Selected column. Then click Next. You will be presented with a list of each of the programs you selected.
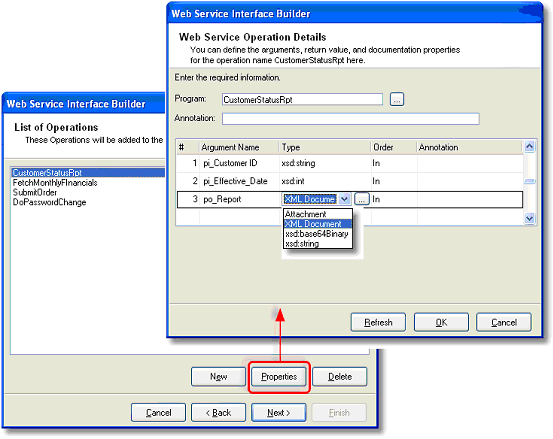
Now, each of the programs you chose will show up on the List of operations. For each of these, you can view and change the Properties, or Operation details. These affect how the Web service appears to the consumer of the service.
If the argument is of type Alpha, Unicode or Blob and it represents a complex type, then if you select XML Document here, you can click the ellipse button to select an XSD to describe the XML.
When you are finished, click Next.
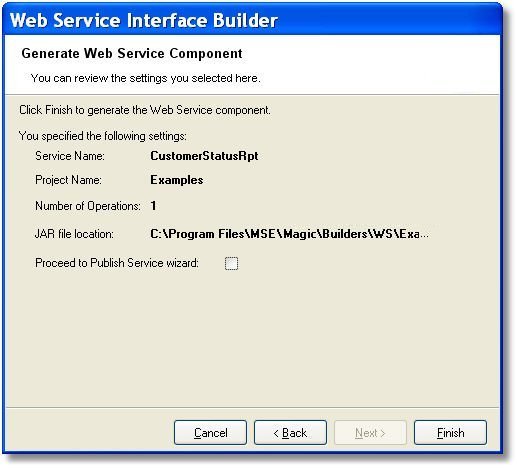
You’ll be presented with a summary screen. Click Finish to continue.
The Publish check box should not be checked unless you want to publish the service in a UDDI registry after it is deployed.

When the process is complete, you will get a status screen. If there were errors, you will get an error message and you can see the error details by clicking the Details button. If there were no errors, the Details button will show you the JAR file location. You can copy and paste the JAR file location to use later, if you want to manually deploy the service.
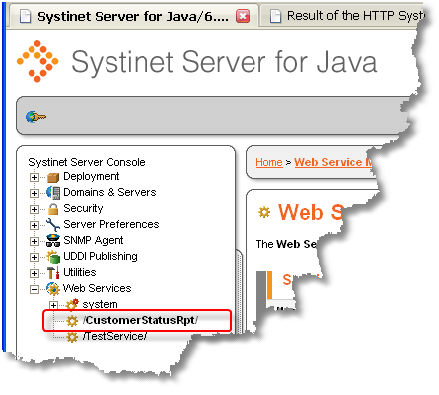
If you checked the Deploy box in the Server Details section above, then the service will be automatically deployed, and you’ll be able to see it and test it using the Systinet console, as described in How Do I Test a Web Service?.
Otherwise, you can manually deploy the service, as described in How Do I Deploy a Web Service Module?.
