How Do I Let End Users Export Their Table's Data into an Excel File? (Magic xpa 3.x)
You can give your end users the ability to export data from a table into an Excel file. You can even give them the ability to generate a chart out of their data. You do this by using the Print Data internal event.
Note: In order for this event to work, set the Print Data task property to Yes in the tasks in which you want to allow the end user to export the data to Excel.
The event can be raised by either using a global entry in the menu or using a specific code per program.
We are now going to raise the event using global event entries:
-
Zoom into the Main Program and:
a. Define a variable, such as Excel type, in the Main Program and set its init value to 1.
b. Define a variable, such as Excel Chart type, in the Main Program and set its init value to 2.
-
Zoom into your menu and:
a. Add an Event entry. Select the Print Data internal event and pass the Excel type variable that you defined earlier as the parameter. This will raise the event and send the value of 1 as a parameter.
b. Add an Event entry. Select the Print Data internal event and pass the Excel Chart type variable that you defined earlier as the parameter. This will raise the event and send the value of 2 as a parameter.
The event can be raised globally (such as by using a toolbar icon or a menu entry) or in specific programs.
Note: If the event is raised from a handler defined in the Main Program, you need to raise the event with the Wait property set to Yes.
We are now going to raise the event in a specific program:
-
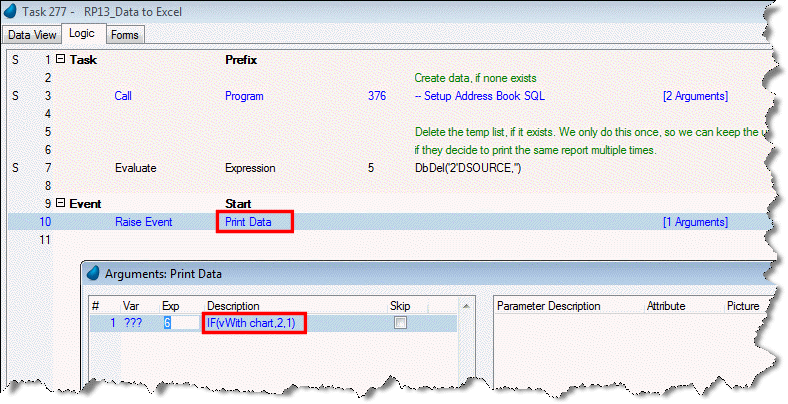
In the Logic tab of a program, create an Event logic unit and raise the Print Data internal event.
-
You can also zoom from the Arguments field and define the type argument, which can have the following values:
-
If the type is 0 or is not set, the Print Data wizard will be launched.
-
If the type is 1, the table's data will be exported into an Excel file.
-
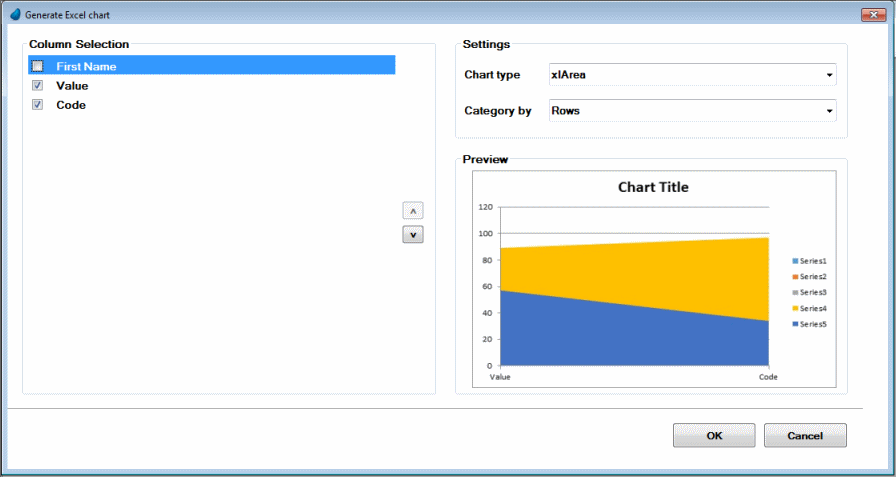
If the type is 2, the table's data will be displayed in a chart. A screen will be displayed and the end user can select what columns to display in the chart and what type of chart to display. Then, the chart and the data will be exported into an Excel file.

-
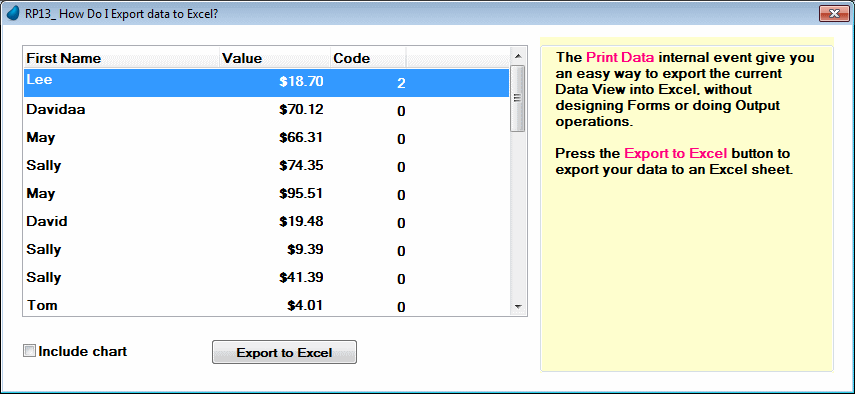
You can now define a button that raises this event and a check box that enables the type argument.

-
When the program runs, the end user can then click on the button to export the data to an Excel file. If the Include chart check box is selected, the chart will appear.

-
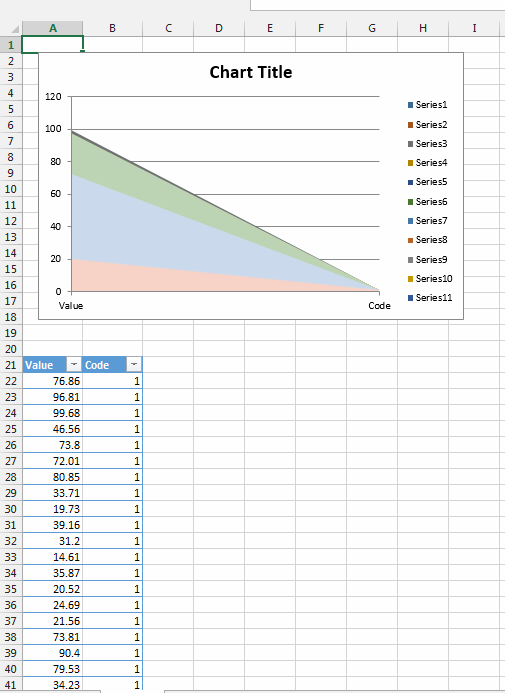
When you click OK, the data and the chart will appear in an Excel file.

Since version: 3.2a
The Online and Rich Client Samples projects (program RP13 and RRP13)

