How Do I Install and Use Third Party Fonts in an iOS App? (Magic xpa 3.x)
To use third party fonts in an iOS app, you first need to include them in your client application and then use them in your Magic xpa application.
-
Copy the iOS Client application from the %EngineDir%RiaModules\iOS\Source folder to your Mac.
-
Open the XCode application on a Mac machine.
-
From the File menu, click Open and navigate to the iOS Client Application source folder.
-
Select the MagicApp.xcodeproj file and open it.
-
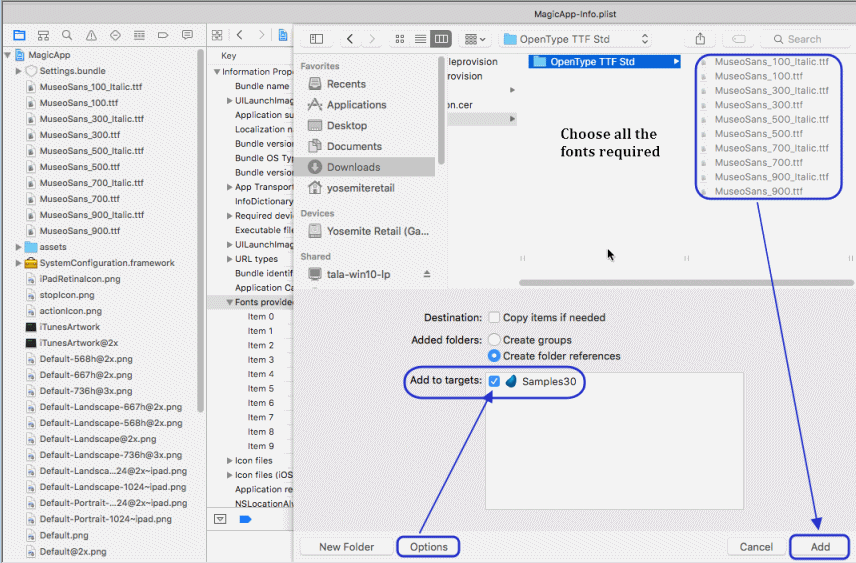
Right click on the project name (MagicApp) on the left side of the project tree view and select Add Files to MagicApp.
-
Select all of the required fonts and click Add. Make sure that the Add to targets section shows your project that you selected.
-
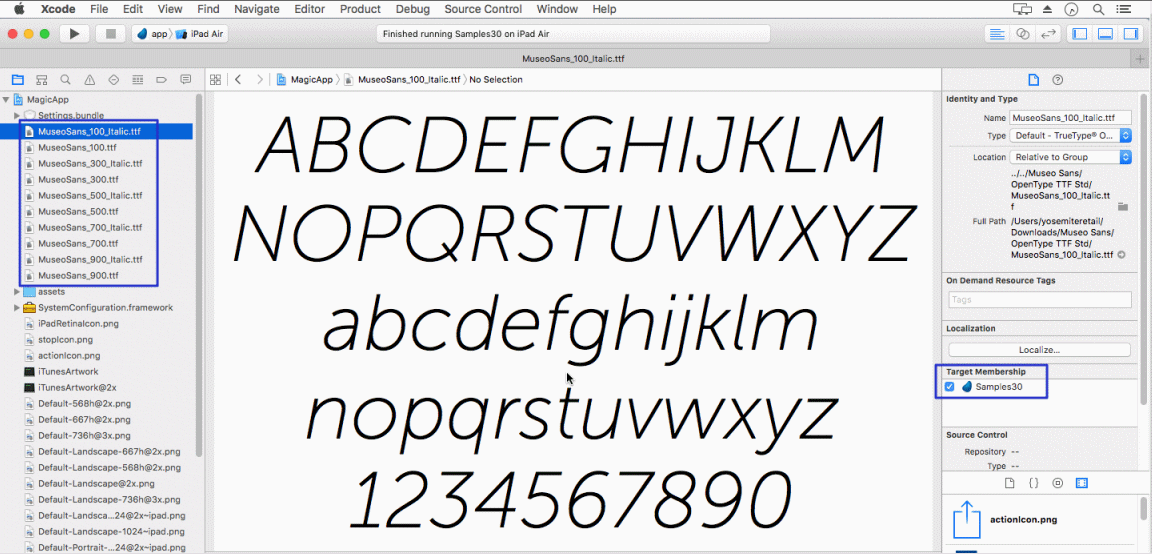
Make sure that the fonts that you selected are included in the build target (bundle): On the left tree view, under MagicApp, for each font listed in the project, check in its properties pane on the right-side that for Target Membership the correct bundle is selected.
-
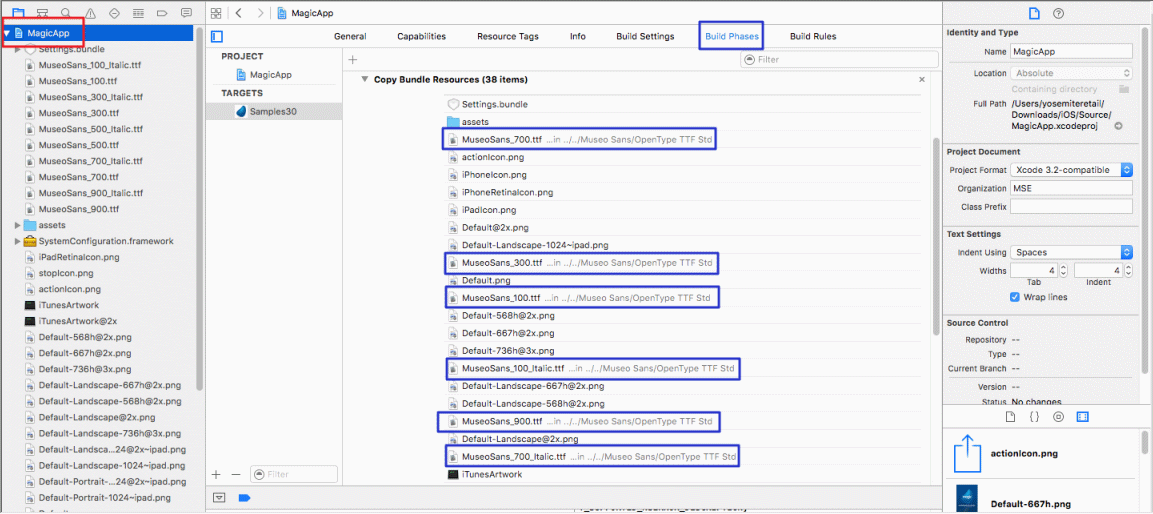
Check that the fonts are included as Resources in the bundle: Highlight the XCode project on the left tree view pane and from the middle pane, select the Build Phases tab and check that the fonts that you added appear in the Copy Bundle Resources section.
Now you want to include the third party fonts in the application's .plist file:
-
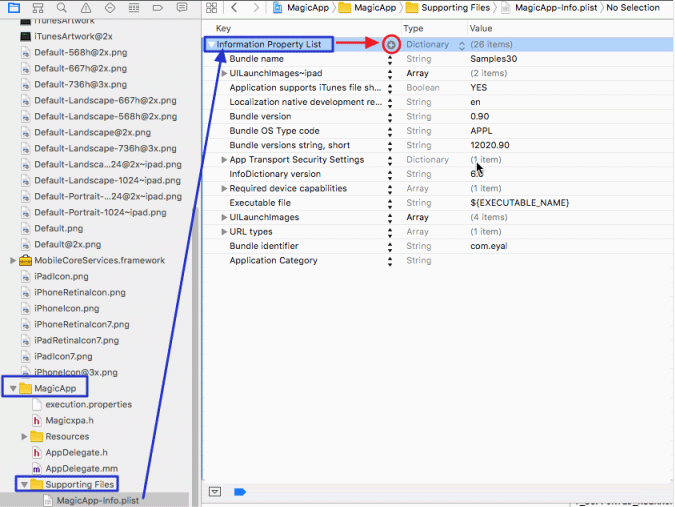
Click the application’s .plist file, which you can find in the left side of the tree view pane, in the MagicApp/Supporting Files subfolder (Magic's default .plist file name is MagicApp-info.plist).
-
Highlight the Information Property List section in the middle pane and click its + (plus) sign.
-
In the new row, type in this text exactly as it appears: Fonts provided by application
-
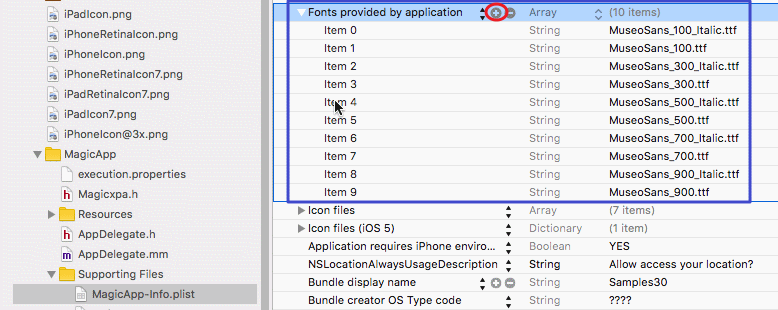
For the new row, add sub-rows that will make this new row of Array type.
Each sub-row is for each of the new third party fonts. Make sure to include the extension and make sure that there are no typos in the filenames.
-
Compile your client application.
The next step is to identify the font’s postscript name and define it in Magic xpa.
To find the font’s postscript name:
-
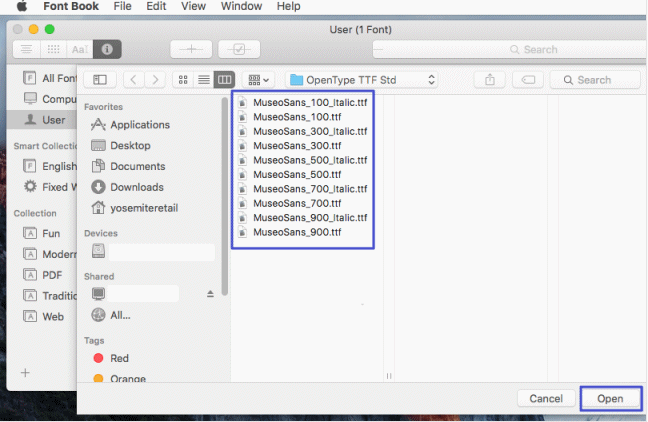
In OS X, open the built-in Font Book utility.
-
Click on the + (plus) sign, and choose to open all the third party required fonts:
-
When you select one of the third party fonts, you will see its (PostScript) name, as shown below.
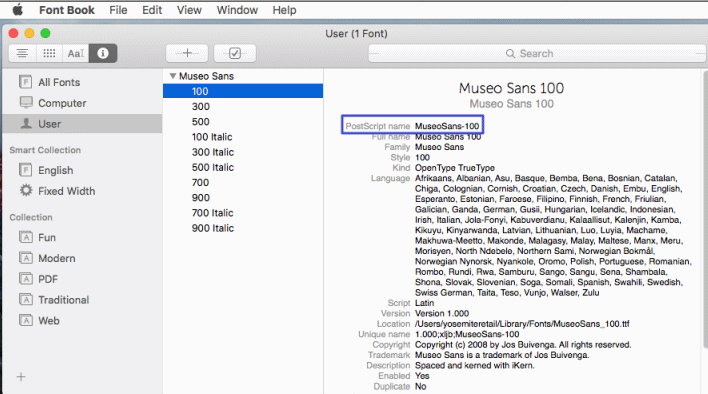
This is the name that should be used in the Magic xpa fonts configuration file.
To use this font in your application:
-
In the Magic xpa application, open the fonts file (by default it is fnt_rnt.eng) using a text editor.
-
Add new lines, one per each new third party font, using its PostScript name, and save the file. For example: MyMuseoFont100,MuseoSans-100,12,0,0
-
Restart the Studio after you save the file.
-
In the Magic xpa application, define this font for the controls that you want to use, as you would do for any font.
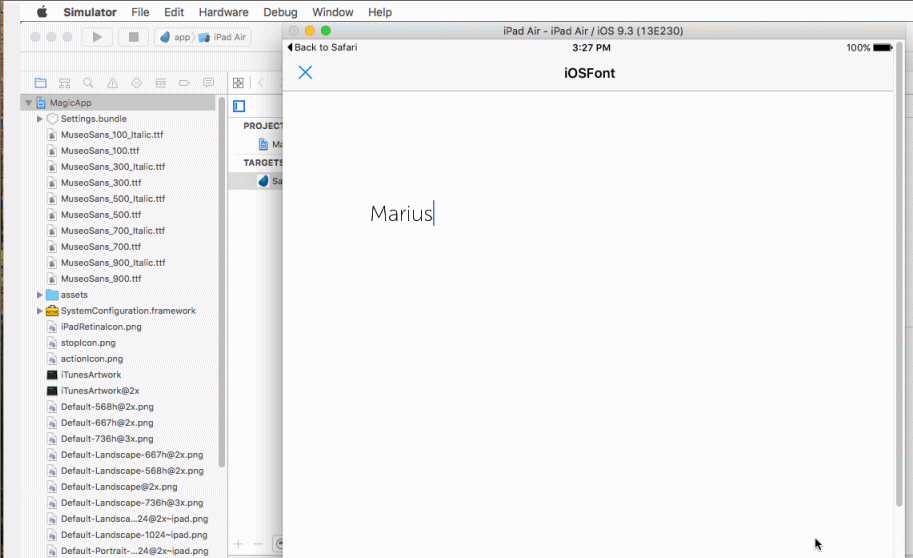
That’s it. You can now run your project and see the new font in your application.