How Do I Create Image Buttons? (Magic xpa 3.x)
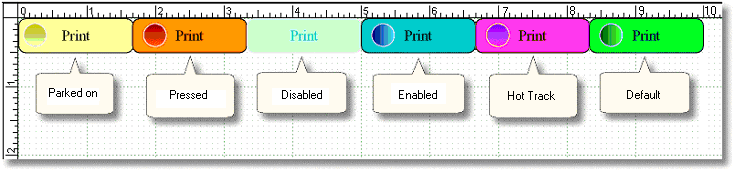
You can use graphic image buttons in Magic xpa if you like. A graphic push button consists of a .bmp file, that has 6 sections of the same size. Here we created one in an image editor, by repeating the same image 6 times and setting each to a different set of colors.
At runtime, Magic xpa uses a different part of the .bmp file, depending on what is going on with the button.
Section 1 (Parked on) appears when the user tabs into the button (which only occurs if it is a button tied to a variable).
Section 2 (Pressed) appears when the button is being pressed.
Section 3 (Disabled) appears when the button is disabled.
Section 4 (Enabled) is the one that shows normally to the user, when the button is not being parked on and it is enabled.
Section 5 (Hot Track) appears when the mouse is hovering over the push button.
Section 6 (Default) appears when the push button is set as the forms' default button.
-
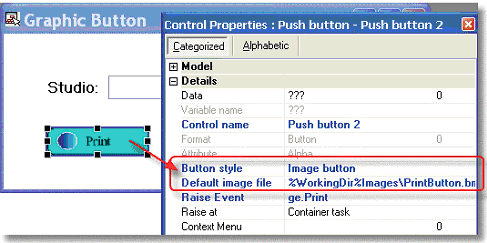
Drop a push button onto your form.
-
For the Button style control property, select Image button.
-
For the Default image file, zoom to select the file. Or, preferably, enter the file name using a logical name to point to the correct directory.
Now, Magic xpa will use the specified .bmp file to display the push button.
The Online and Rich Client Samples projects (program HG26 and RHG26)
