How Do I Configure the CVSNT Server? (Magic xpa 3.x)
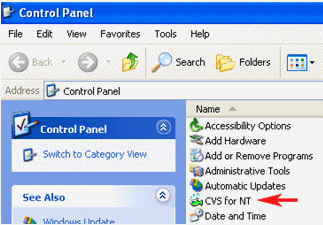
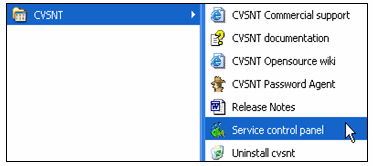
CVS has a Control Panel that you will use to set it up. You can access this from Start->Control Panel, or from Start->CVSNT->Service Control Panel.
|
|
|
|
Control Panel
|
Service Control Panel
|
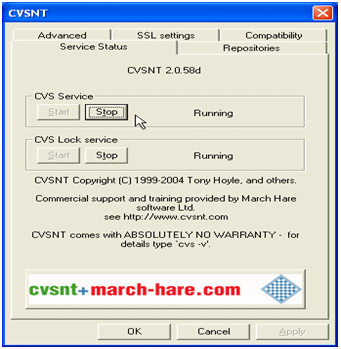
From here, you can start or stop CVS, and make changes to the installation. If you make changes, be sure to stop it and restart it before continuing.
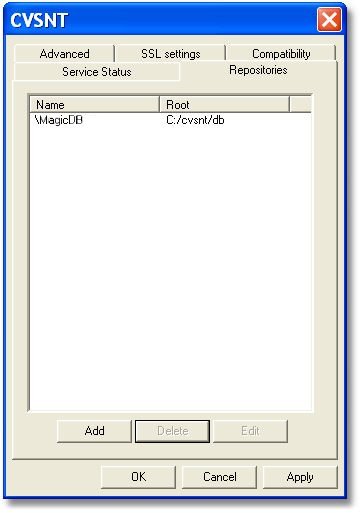
You want to pay particular interest to the Repositories setting. Here, “MagicDB” is the repository that Magic xpa uses.
CVSNT requires the backslash (\) in front of the name.
On the right you will see the “Root”. This is where the CVS data will actually be stored, so it has to be a valid file system location. Here, we are storing our data in “C:/cvsnt/db”.
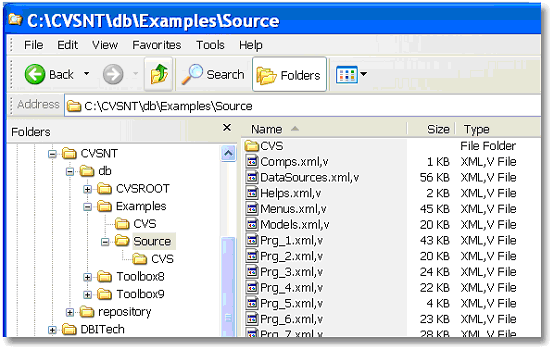
Now, when a project is checked in to CVS, you will see the project’s XML files listed in CVS. Here, you can see the “Examples\Source” XML files listed under “CVSNT/db”. These files are read-only, but you can look at them. They are the same XML files that are listed in our Examples\Source directory, plus some other data that CVS uses to track them.
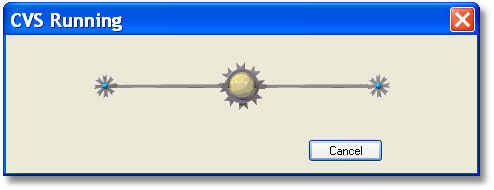
When Magic xpa source files are added to the version control project, the CVS Running Screen appears, as shown above. Some processes can take a fair amount of time to complete, so just be patient.
When the CVS Running screen closes, the Magic xpa project has been connected to CVS.
To add or update a CVS repository:
-
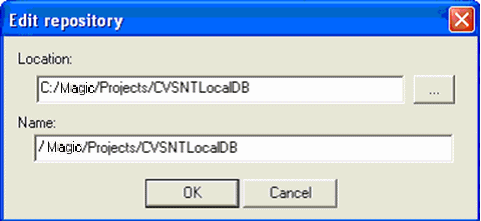
From the CVSNT dialog box, from the Repositories tab, click Add. The Edit repository dialog box opens.
-
You can select the desired location for the CVS repository (where the version control projects will be stored) by pressing the [...] button next to the Location field.
Note that the users who will work on the CVS server need to have update rights to this folder.
-
Click OK.
-
If the folder does not exist, a confirmation message will appear. Click Yes to create the folder.
-
If the folder already exists and it is not initialized, a confirmation message will appear. Click Yes to initialize it.
-
If any problems occur, an error message appears.
-
If no problems occurred, after clicking Yes, the new repository appears in the Repositories List.
-
On the Service Status tab, click Start from the CVS Service section to run the service again, and then click OK to close the CVSNT.
When the CVSNT service is running, you cannot delete local directories associated with a CVS project. If you want to delete a directory:
-
Run the CVS for NT utility and stop the service, as described above.
-
Delete the directory.
-
Restart the CVS Service, as described above in Step 8.
You can define the domain from which the users will have access to the CVSNT server.
-
Run the CVS for NT utility and stop the service, as described above.
-
Click the Advanced tab and select a default domain from the Default domain field.
-
Define the Temporary Directory to be used.
-
Note that the users who will work on the CVS server need to have update rights to this folder.
-
Restart the CVS Service, as described above in Step 8.
