How Do I Change the Studio Color and Fonts? (Magic xpa 3.x)
In Magic xpa, the colors and fonts are divided into 3 separate files:
-
Studio: The colors and fonts you see while working in Magic xpa
-
Runtime Application: The colors and fonts you use to create your application
-
Runtime Internal: The colors and fonts used by Magic xpa at runtime (for items that are part of the basic structure of Magic xpa, such as pop-up dialogs and menus)
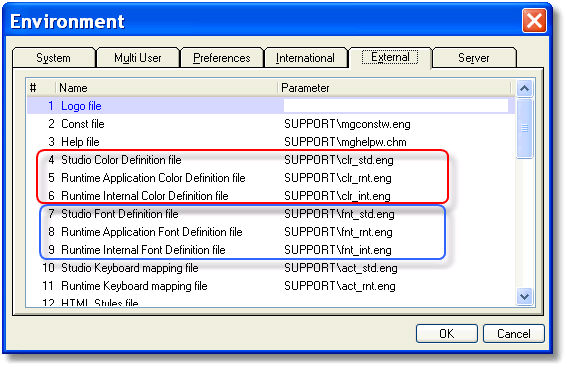
The files that are used to hold each of these color and font definitions are specified in the Magic.ini. You can easily set the files used by changing them in Options->Settings->Environment->External tab, as shown above.
It can be very useful to customize the Studio color and font files to fit your work style, screen resolution, and screen size. You may even want separate color and font files depending on whether you are working on a laptop or desktop.
-
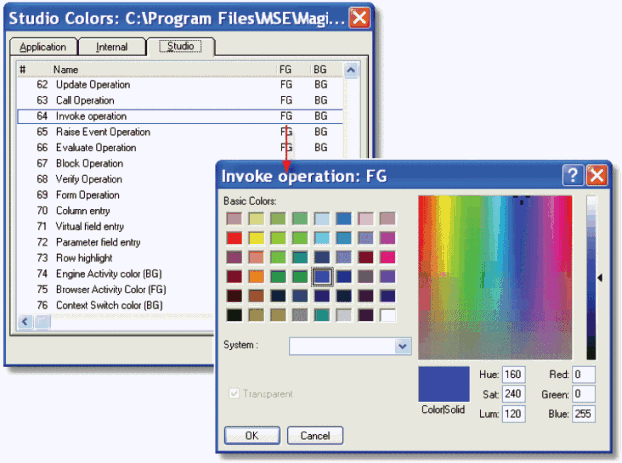
Go to Options->Settings->Colors.
-
Click on the Studio tab.
-
Scroll to the values you want to change. The Operation colors, for instance, are useful ones to change because you can make your programs easier to read.
-
You can zoom from the foreground color (FG, which changes the text color) or background color (BG, which changes the color of the field the text sits on, the row color). When you zoom, the Windows color picker will appear.
-
If you choose a System color, then the color will be inherited from Windows.
-
Otherwise, if the System color is blank, you can choose a Basic color or choose a custom color.
-
When you are done, click OK.
-
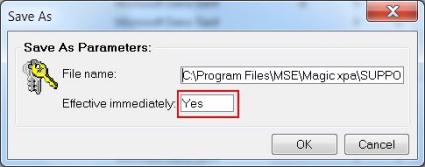
When you exit the Colors dialog box, you will be see a Save As dialog box. Set Effective immediately to Yes, and click OK.
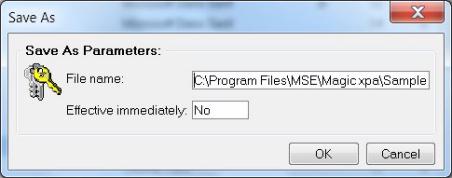
Now your new colors will be in effect.
The colors will be saved in the text file specified in the Magic.ini and will be effective immediately.
-
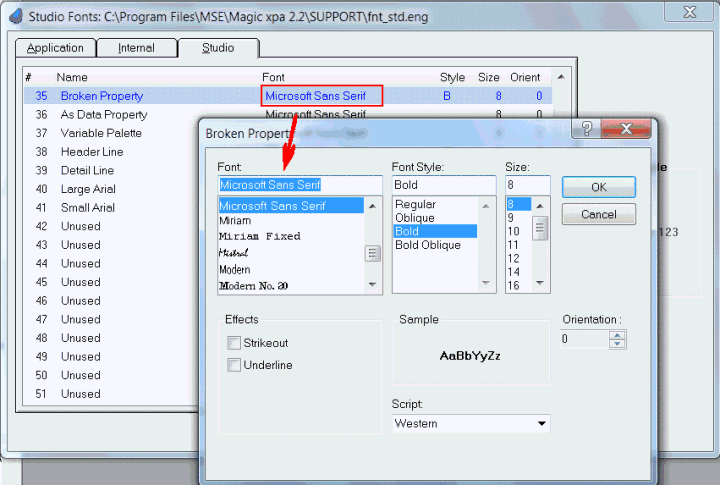
Go to Options->Settings->Fonts.
-
Click on the Studio tab.
-
Scroll to the values you want to change.
-
Zoom from the Font column to change the font. A font dialog box will appear. You can choose the font, font style, and size. You will see a sample of the selected font in the Sample box onscreen.
-
When you are satisfied, click OK.
-
When you are done changing the Studio Fonts, click OK. You will see a Save As dialog box, as shown above. Change Effective immediately to Yes, and click OK.
-
Now your new colors will be in effect.
The fonts will be saved in the text file specified in the Magic.ini and will be effective immediately.
